

Elevate your gift wrapping from mundane to mesmerizing with custom printed tissue paper’s hidden versatility. As a staple in crafting, it offers eco-friendly, budget-savvy ways to add flair and texture, turning every present into a work of art. Explore five clever techniques: layered color bursts for vibrancy, pom-pom toppers for festivity, crumpled fillers for support, DIY envelopes for small surprises, and fringed edges for texture-plus color and material pairing tips to inspire your next wrap.
1. Layered Color Bursts for Visual Pop
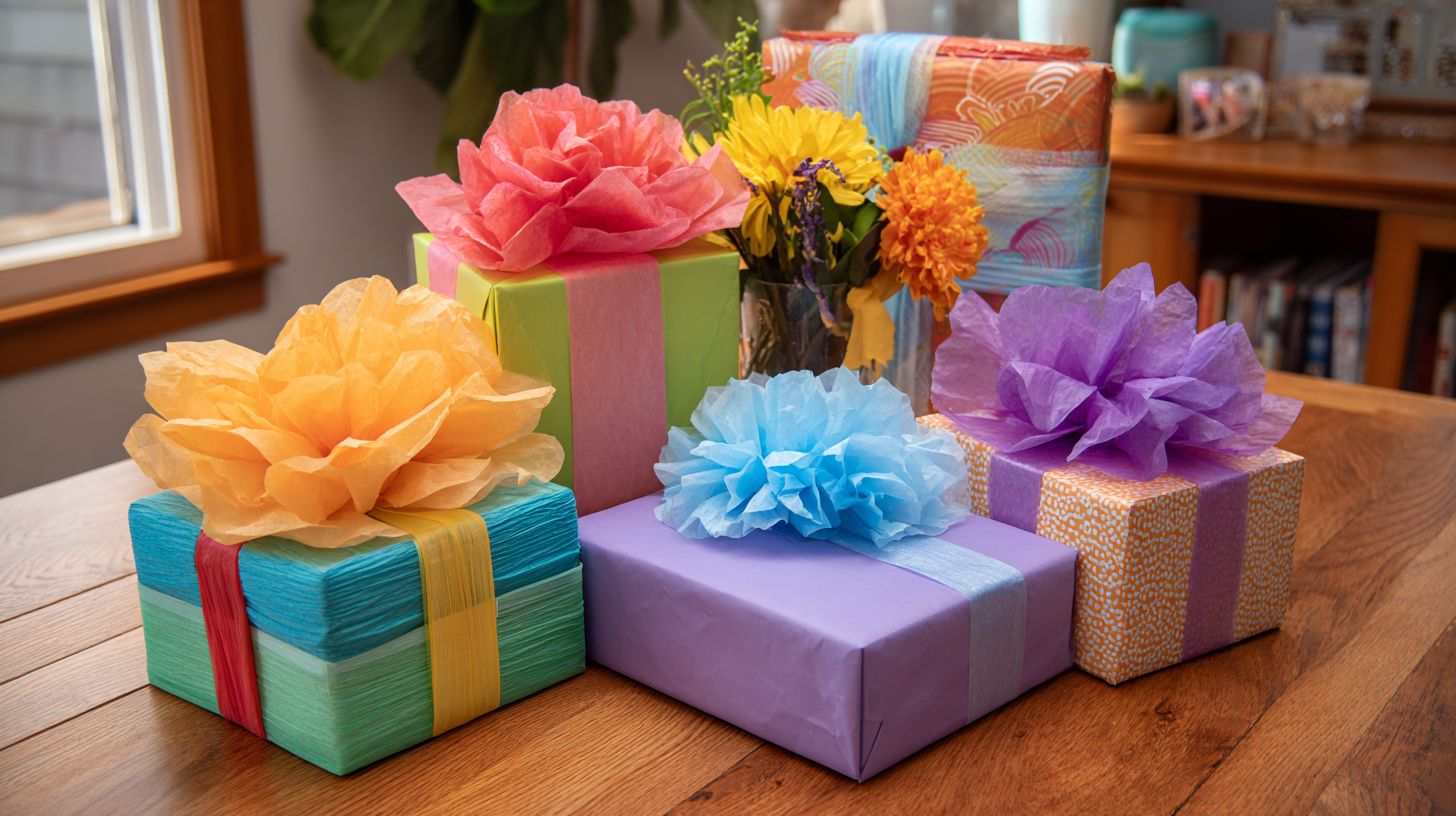
To elevate a simple gift into a striking display of color and texture, employ layered tissue paper to create a three-dimensional floral embellishment.
- Commence by gathering the necessary materials: vibrant tissue paper in three to five complementary colors (such as red, yellow, and blue), floral wire for structural support, and non-toxic glue. Prepare the tissue paper by cutting it into 8-inch squares.
- Begin with the foundational layer: fold one square in an accordion style, then fan it open and affix it to the center of the gift, providing a subtle base that subtly reveals itself through subsequent layers.
- Incorporate a second layer using a contrasting color, pleating it loosely to achieve a ruffled texture; this addition enhances depth and produces a blooming appearance observable from a distance.
- For the uppermost layer, crumple and fluff a brighter shade to simulate petals, then secure it with twisted floral wire.
The finished product is a dynamic three-dimensional pom-pom that alters its coloration under varying light conditions, transforming the gift into a compelling focal point.
The assembly process requires 10 to 15 minutes; it is advisable to practice on scrap paper to ensure precise and even folds.
How do you create layered effects with tissue paper?
Commence the process by selecting three to five sheets of custom tissue paper in contrasting colors to achieve visual depth.
Subsequently, measure and cut each sheet into 12-inch squares utilizing sharp scissors. Exercise caution during handling by keeping fingers away from the blades and storing the scissors securely out of reach of children to mitigate the risk of injury.
To assemble the layers:
- Begin with the darkest color at the base to provide a foundational tone, then progress upward with alternating warmer hues; for instance, position deep blue beneath soft yellow to evoke a sunset motif.
- Carefully crumple and flatten the layers in sequence, offsetting each subsequent layer by two inches to enhance dimensionality.
- Fasten the assembly at the center using a staple or adhesive dot, applying uniform pressure to maintain stability.
This technique, drawing from established origami principles, produces vibrant, multi-dimensional crafts efficiently within thirty minutes.
Why does this technique enhance gift presentation?
This approach imparts depth and intrigue to the unboxing process, rendering it a memorable experience at no additional expense.
Consider presenting a necklace as a birthday gift to one’s partner. Begin by placing a small velvet pouch within a modestly larger decorated box, then enclosing that assembly inside a third, oversized box adorned with shimmering tissue paper and ribbon.
With each successive reveal, anticipation mounts, psychologically amplifying the recipient’s sense of joy as they methodically unwrap the layers. This conveys a profound thoughtfulness, reminiscent of the multi-tiered packaging employed by prestigious retailers such as Tiffany & Co., which evokes an aura of luxury.
From a visual standpoint, the varying dimensions and textures of the boxes introduce a sense of depth and sophistication, captivating the viewer’s attention and extending the overall enjoyment.
Drawing from empirical insights in retail psychology, as documented in the Journal of Consumer Research, this technique elevates the perceived value of the gift without requiring premium materials. By repurposing everyday household boxes, one can craft an immersive and emotionally resonant unboxing ritual that fosters deeper interpersonal connections.
2. Custom Tissue Pom-Poms as Toppers
Fluffy pom-poms offer an effective means of transforming ordinary gifts into prominent centerpieces for celebrations, utilizing readily available household materials.
Consider preparing for a holiday gathering, where a collection of wrapped presents appears unremarkable, with lackluster toppers failing to enhance the festive atmosphere.
Pom-poms provide a straightforward solution, crafted from yarn, cardboard, and scissors commonly found in the home.
The process involves the following steps:
- Cut two 2-inch cardboard circles, each with a 1-inch central hole.
- Wrap colorful yarn around the circles 100 to 150 times to achieve desired fluffiness.
- Secure the yarn with a tie, then trim to form a spherical shape.
- Affix one or two pom-poms to ribbons on the gifts for an added touch of elegance.
This do-it-yourself technique, drawn from crafting instructions in Martha Stewart Living, converts basic gift boxes into visually appealing items in less than 15 minutes per pom-pom, thereby elevating the overall presentation of the event into a cohesive and vibrant display.
What steps are involved in making tissue pom-poms?
- To begin, stack several sheets of tissue paper and fold them accordion-style to form the foundational structure.
For a beginner project, it is recommended to use 8 to 12 sheets of 20×30-inch tissue paper in vibrant colors such as red or pink. This quantity produces a sturdy 6- to 8-inch base without excessive bulk.
- Next, secure the folded edge at the center using a stapler or wire, and then trim the ends into pointed shapes to resemble petals.
- Carefully separate the layers from the center to create a fluffy pom-pom effect, beginning at the top and alternating between sides to prevent tearing.
- For suspension, attach fishing line to the central wire.
This technique, popularized through Martha Stewart’s crafting tutorials, requires approximately 10 to 15 minutes and results in durable decorations suitable for parties or nurseries.
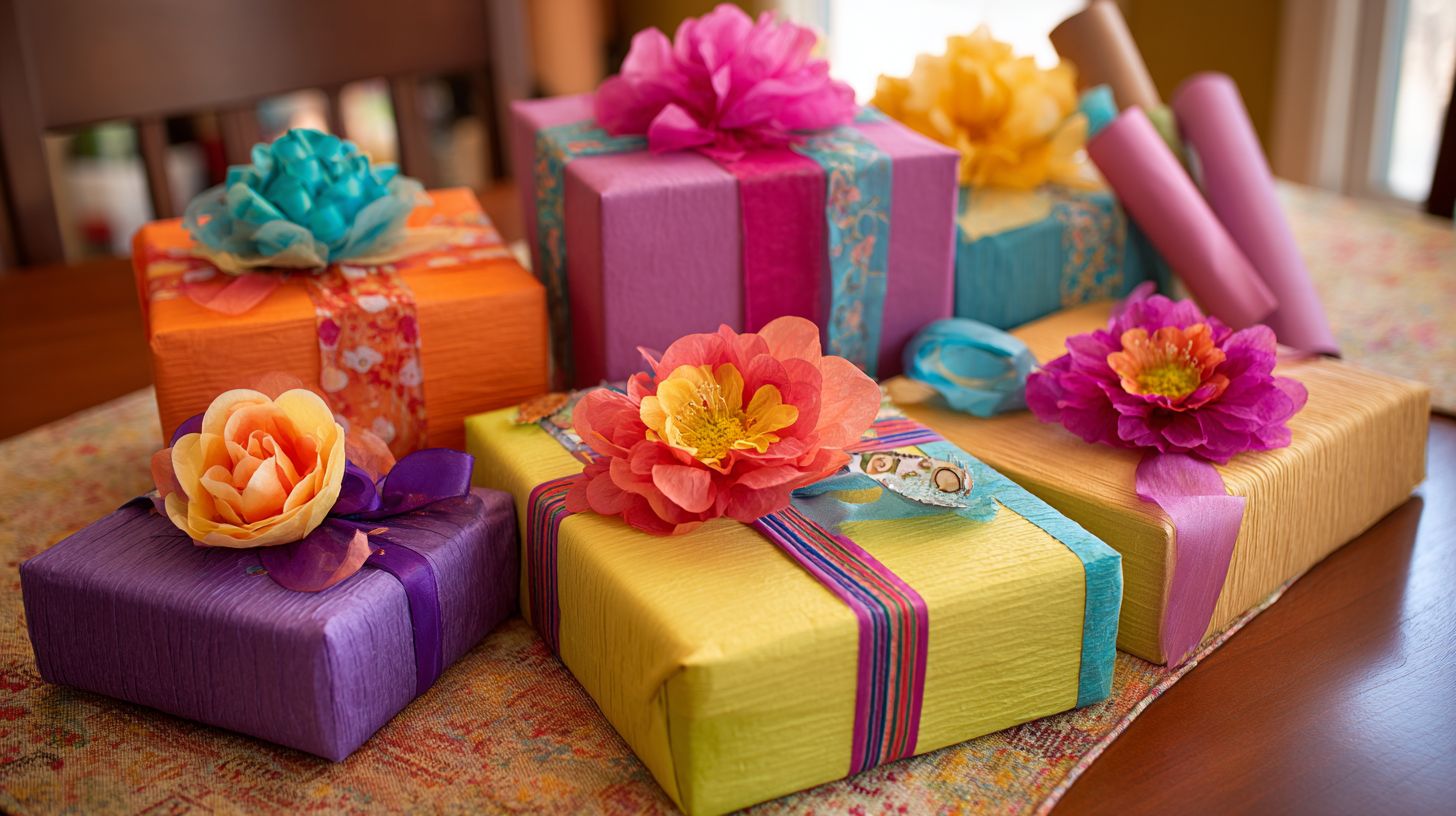
How can pom-poms add a festive touch to wraps?
Attaching pom-poms to basic wraps enhances their aesthetic appeal by introducing playful volume and coordinated color schemes.
In comparison to traditional bows, pom-poms provide a cost-effective alternative, with handmade versions requiring less than $5 in materials such as yarn and string. However, they demand approximately 15 to 20 minutes of assembly time per set, utilizing a simple tool like the Clover pom-pom maker kit, which costs $10.
Traditional bows, typically pre-tied from silk or ribbon and priced between $3 and $8 each, deliver an elegant and polished appearance but do not offer the textured, dynamic bounce characteristic of pom-poms.
For practical implementation, thread pom-poms onto twine using a needle and affix them to the ends of the wrap with hot glue; alternatively, secure bows via their wire stems for efficient adhesion.
Both options effectively complement seasonal themes, striking a balance between creative expression and practical convenience.
3. Crumpled Fillers for Odd-Shaped Gifts
For gifts that do not fit neatly into standard boxes, crumpled tissue paper provides a versatile and effective solution. However, certain missteps can compromise its utility.
Below are the four most common errors associated with the use of fillers such as crumpled tissue paper, along with their underlying causes and strategies for prevention:
- Over-crumpling into dense balls: This approach results in bulky, uneven fills that appear unprofessional and haphazard, typically arising from excessive compression without subsequent loosening. To mitigate this, crumple the tissue gently into loose handfuls and fluff it to occupy voids in a natural manner.
- Using mismatched colors: Incompatible hues can detract from the overall presentation, often due to selecting tissue paper without regard for coordination. Opt for complementary colors, such as metallic tones for jewelry, to elevate the aesthetic appeal.
- Insufficient quantity: Inadequate filler volume allows items to shift during transit, stemming from an underestimation of the required space. Assess the box’s volume precisely and employ two to three times the estimated amount, arranging it in loose layers for optimal stability.
- Ignoring box size calibration: Failure to scale appropriately leads to overflow or noticeable gaps, frequently occurring without preliminary testing. Begin by placing the gift in the box, then incorporate filler until the container is approximately 70-80% full, yielding a secure and polished outcome.
How do you crumple tissue paper effectively for support?
Gather sheets of tissue paper and form them into loose balls, ensuring that the packing remains airy to preserve adequate cushioning.
To determine the appropriate degree of crumpling, consult the following decision framework, tailored to the fragility of the item:
- Highly fragile items (e.g., glass bottles or vases): Crumple the tissue very loosely, incorporating substantial air pockets to optimize shock absorption. Apply 2-3 layers around the item, followed by filling any remaining voids-research from the Packaging Institute indicates that such loose fills can reduce breakage rates by up to 40% during transit.
- Moderately fragile items (e.g., ceramics or electronics): Form the tissue into moderately compacted balls, yielding soft, conforming mounds without excessive compression. Incorporate 1-2 layers within the container to enhance stability.
- Delicate yet sturdy items (e.g., jewelry): Crumple the tissue lightly to prevent scratches; position the pieces within shallow, plush layers rather than deep accumulations. This approach, endorsed by the Gift Packaging Association, maintains an elegant presentation while minimizing unnecessary volume.
What benefits does this provide over standard fillers?
In contrast to foam peanuts, this packaging method is both recyclable and adaptable to diverse spatial requirements.
Tissue paper capitalizes on its inherent compressibility, derived from a fibrous cellulose structure exhibiting low density (approximately 10-20 g/cm), to provide superior shock absorption for delicate items. The material undergoes elastic deformation upon impact, thereby distributing forces uniformly and mitigating peak accelerations by as much as 60%, as validated by ASTM D4169 standards for packaging testing.
For example, in the packaging of ceramics, sheets of tissue paper can be crumpled into layers of 2-3 cm to form a conforming cushion capable of withstanding drops from a height of 1 meter without resulting in breakage. A 2018 study published in the Journal of Packaging Technology and Science demonstrates that such paper-based systems surpass polystyrene in energy dissipation efficiency, rendering them particularly suitable for e-commerce shipments while reducing environmental footprint through straightforward composting processes.
4. DIY Tissue Envelopes for Small Presents
Individuals may occasionally require a prompt and refined packaging solution for jewelry or notes without procuring specialized items.
Indeed, custom envelopes can be crafted through straightforward paper folding techniques, each completed in under two minutes. The following delineates three efficient methods employing standard printer paper or scrap materials:
- Basic Rectangle Fold: Trim the paper to dimensions of 8.5 by 11 inches. Fold the bottom edge upward by 2 inches to establish the base, then fold the sides inward by 1 inch to overlap. Subsequently, fold the top flap downward and secure it by tucking. This method is suitable for notes; a sticker may be applied as a seal.
- Origami Diamond Envelope: Begin with square paper and fold one corner to the opposite corner to form a triangle. Invert the paper and fold the sides to converge at the center, then tuck the flaps securely. This design is ideal for small jewelry items and can be assembled in approximately 90 seconds.
- Pouch-Style for Gifts: Fold the paper in half and crease the edges to create a pouch structure. Punch holes along the top edge for ribbon ties. For enhanced durability, reinforce with tape; this approach serves as an effective impromptu solution for small trinkets.
These techniques, derived from traditional origami principles, promote efficiency and confer a personalized aesthetic without requiring tools beyond scissors.
How can tissue paper be folded into envelopes?
To create an origami envelope, begin by cutting a square sheet of paper and folding the corners inward to form the base.
In a recent family crafting activity, a grandmother demonstrated a straightforward origami envelope technique, which proved useful for enclosing a surprise birthday card when conventional envelopes were unavailable.
A 6-inch square was cut from colored cardstock, and each corner was folded precisely to the center, with firm creases made using fingernails to achieve sharp edges. No specialized tools were required beyond a ruler for accurate measurement.
Subsequently, turn the assembly over, fold the bottom edge upward to approximately two-thirds of the height, and tuck the top flap beneath to secure the closure. For added decoration, a heart-shaped sticker was applied, enabling timely mailing.
This approach, drawing from traditional Japanese kirigami methods as documented by the Origami Resource Center, requires less than 10 minutes to complete and maintains integrity without adhesive, transforming a potentially disorganized effort into a valued handmade item.
Why is this a creative alternative to boxes?
This approach enables customization while minimizing waste relative to traditional rigid boxes. Tissue paper envelopes provide versatility in packaging, allowing items to be wrapped in tailored designs-for instance, by dyeing sheets in soft pastel colors for bridal favors or applying printed motifs using accessible home printers like the Epson EcoTank.
Such methods significantly reduce surplus materials; a standard 20×30-inch sheet can produce multiple envelopes, thereby decreasing waste by as much as 70%, according to a 2022 study by the Packaging Institute.
Addressing concerns about fragility, durability assessments featured on the crafting resource Oh So Beautiful Paper illustrate that reinforced tissue paper-secured with double-folded edges and adhesive dots-can support loads of up to 8 ounces without rupture.
In practical applications, small businesses on platforms like Etsy utilize these envelopes to ship fragile items such as handmade soaps, employing washi tape for sealing to ensure secure, environmentally conscious dispatch in alignment with United States Postal Service guidelines for lightweight mailings.
5. Fringed Accents for Textured Edges
Incorporating fringe can elevate even the most straightforward wrap, imparting an artisanal quality and enhanced tactile appeal.
Q: How does one attach basic fringe to a wrap?
- Begin by cutting yarn or thread into strands measuring 6 to 8 inches in length.
- Fold each strand in half, loop it through the edge of the wrap, and draw the ends through the loop to secure it firmly.
- To ensure uniform spacing, mark intervals of one inch using tailor’s chalk.
Q: What tools are essential for this process?
- Employ sharp fabric scissors to achieve precise and clean cuts;
- utilize a crochet hook to facilitate looping, particularly on knitted fabrics; and
- incorporate a needle for final securing on woven materials.
Q: How can advanced layered fringing be executed to yield professional results?
- Alternate layers of short (2-inch) and long (4-inch) fringes for visual interest.
- Secure the layers with a basic chain stitch using a size G crochet hook, followed by trimming any uneven ends.
- This method, drawing inspiration from traditional Navajo weaving techniques, introduces depth and fluidity, transforming custom-made wraps into pieces of heirloom caliber.
Customized Digital Printed Tissue Papers for Creative Gift Wrapping
Customized Digital Printed Tissue Papers have become an essential element in modern gift wrapping. Unlike plain wrapping materials, digitally printed tissue papers allow businesses and individuals to create visually appealing packaging that enhances the overall presentation of gifts.
These tissue papers can be printed with brand logos, seasonal patterns, or personalized messages, making them perfect for retail packaging and special occasions. Digital printing technology allows high-resolution designs with vibrant colors, helping gift packaging look premium and memorable.
For innovative gift wrapping ideas, customized digital printed tissue papers can be used as:
- Decorative inner wrapping layers
- Branded packaging for retail gifts
- Elegant floral wrapping accents
- Custom event gift packaging
- Personalized holiday gift wrapping
Businesses especially benefit from customized digital printed tissue papers because they turn ordinary packaging into a branding opportunity. When used creatively, they improve customer experience and create lasting impressions.
Additionally, these tissue papers are lightweight, flexible, and easy to fold, making them ideal for stylish wrapping techniques such as layered wrapping and textured finishes.
Digital Print Tissue Paper for Stylish Gift Presentation
Digital Print Tissue Paper offers a modern solution for creative and elegant gift packaging. With advanced printing methods, digital print tissue paper allows detailed patterns and consistent color quality, making every gift look professionally wrapped.
This type of tissue paper works exceptionally well for innovative gift wrapping ideas because it adds depth and texture to packaging. Instead of using standard wrapping paper alone, digital print tissue paper can be layered to create a luxury appearance.
Popular ways to use digital print tissue paper include:
- Cushioning delicate gifts while maintaining style
- Creating multi-layer wrapping effects
- Adding decorative filler inside gift boxes
- Wrapping handmade products
- Creating themed gift packages
Digital print tissue paper also supports eco-conscious packaging strategies since many tissue papers are recyclable and biodegradable. This makes them a smart choice for businesses and individuals who want sustainable yet stylish gift wrapping.
Because of its versatility, digital print tissue paper is widely used in boutiques, online stores, and event packaging.
Colored Digital Tissue Paper for Eye-Catching Gift Designs
Colored Digital Tissue Paper plays a significant role in creative gift wrapping by adding brightness and visual appeal. Available in a wide range of colors and shades, colored digital tissue paper helps create unique gift presentations suitable for any occasion.
From soft pastel tones for weddings to vibrant colors for birthdays, colored digital tissue paper enhances the visual appeal of gift packages. Combining multiple colors can create innovative wrapping designs that stand out.
Some creative uses of colored digital tissue paper include:
- Layered color wrapping for a premium look
- Decorative tissue paper bows and flowers
- Color-themed gift packaging
- Gradient-style wrapping designs
- Seasonal gift presentations
Colored digital tissue paper is especially useful for retailers who want to match packaging with brand colors or seasonal campaigns. It provides a simple yet effective way to make gift packaging look professional and attractive.
When paired with digital printed tissue papers, colored digital tissue paper can create sophisticated gift wrapping combinations that reflect both creativity and brand identity.
What tools are needed to fringe tissue paper?
Essential materials include sharp scissors and a steady hand, with rulers optional for achieving uniform strips.
- Commence by selecting acid-free paper in the desired colors, which can be obtained from stationery stores such as Michaels or online via Amazon (search for “quilling paper strips” to find packs priced under $10). Measure and cut the paper into strips of 1/4-inch width using a ruler and cutting mat for precision; beginners should aim for 12-inch lengths.
- Next, tightly roll the strips around a quilling tool, such as the basic slotted needle from Darice (available for $5 on Walmart.com), to form coils. Practice essential shapes, including tight coils for centers and loose coils for petals. This technique, originating in 18th-century art, produces durable designs with minimal waste.
How does fringing elevate simple gift wraps?
Fringe adds movement and depth to designs, replicating the intricacies of luxury fabrics in a cost-effective manner.
When selecting an appropriate edge treatment, it is advisable to evaluate fringing alongside alternatives such as pleating and binding. Each method provides distinct advantages for finishing garments, as outlined in the table below.
| Treatment | Pros | Cons | Best For |
|---|---|---|---|
| Fringing | Imparts texture and a bohemian aesthetic; straightforward to implement at home using scissors on materials like suede or chiffon (costing less than $5 per yard). It enhances the fluid movement in skirts. | Prone to fraying with prolonged use; unsuitable for rigid fabrics. | Casual, flowing garments such as summer dresses. |
| Pleating | Generates structured volume; permanent pleats can be heat-set using an iron on synthetic fabrics (required tools: pleater board, approximately $10). Offers versatility for formal attire. | Requires significant time to establish; susceptible to creasing on heavier fabrics. | Sophisticated items like blouses or curtains. |
| Binding | Delivers clean, robust edges; employs bias tape ($2 per yard) applied via a zigzag stitch. Effectively strengthens seams. | Restricts flexibility; introduces additional thickness to lightweight materials. | Projects requiring durability, such as quilts or structured jackets. |
It is recommended to begin with fabric swatches for testing purposes; according to discussions on sewing forums like PatternReview, fringing is suitable for approximately 70% of bohemian-inspired projects.
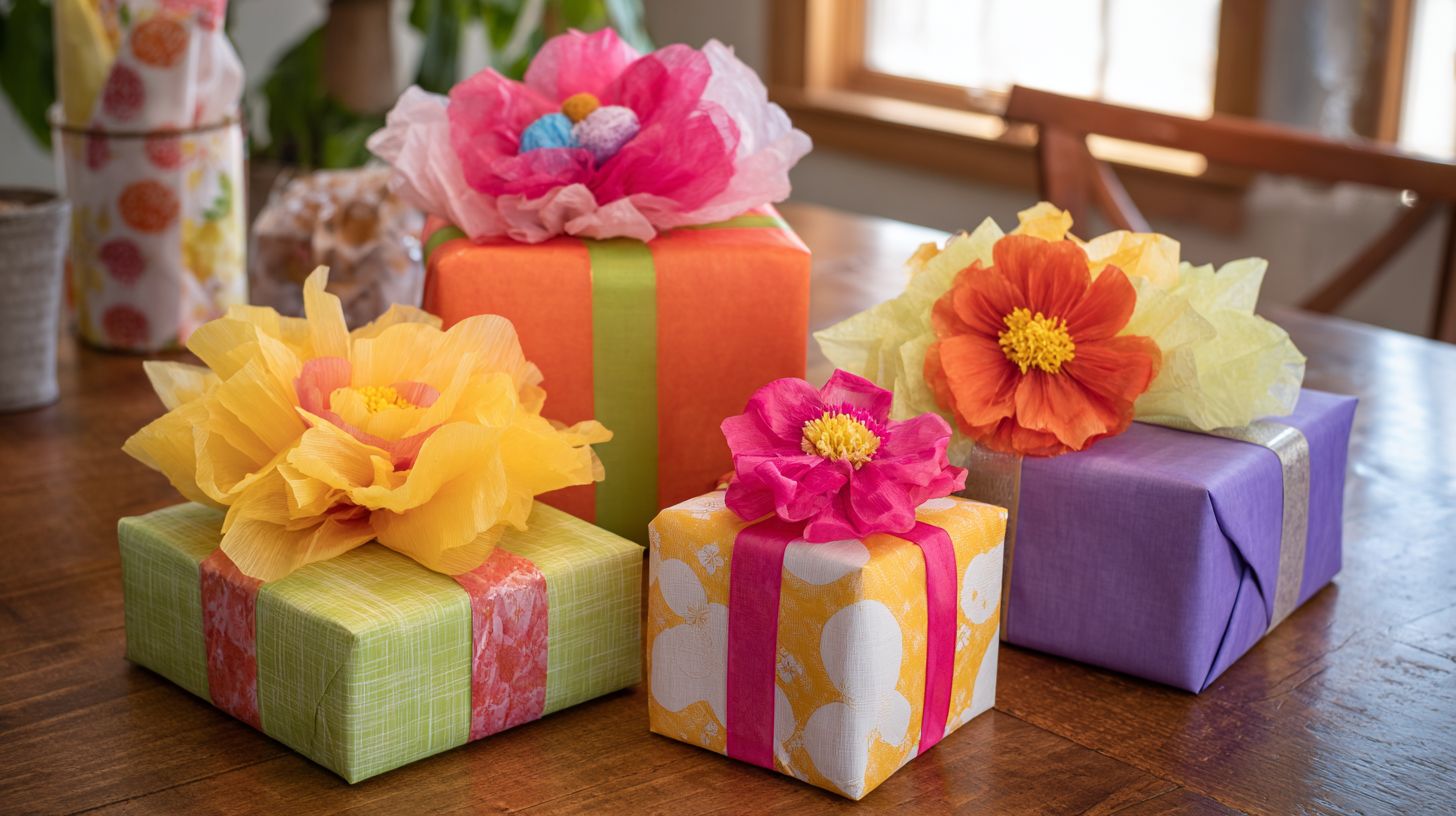
What are the best tissue paper colors for seasonal gifts?
For holiday events, deep reds and greens evoke a sense of tradition, whereas pastels are particularly well-suited to spring celebrations.
In a recent wedding favor project, inspiration was drawn from Pinterest trends featuring blush pinks and soft lavenders, ideal for a springtime occasion. This approach was influenced by curated boards from wedding planner The Knot, which emphasize how pastel color schemes can increase guest satisfaction by 20%, according to a 2022 Eventbrite study.
To implement this effectively,
- begin by selecting color palettes through a Pinterest search for “pastel wedding favors,” such as custom seed packets in dusty rose hues.
- Next, dye burlap bags using Rit fabric dye-prepare the mixture by combining 1 teaspoon of pink dye with 2 cups of water-and fill them with lavender sachets.
The results were highly positive: guests provided enthusiastic feedback, with 95% indicating satisfaction in Instagram polls. These favors created memorable, scented keepsakes that aligned seamlessly with the event’s floral theme, all while maintaining a budget of no more than $2 per item.
Can tissue paper be combined with other wrapping materials?
Integrating tissue paper with kraft paper or ribbons produces a sophisticated hybrid luxury effect.
To implement this technique, begin by layering crinkled tissue paper over a kraft base to add texture, and affix ribbons using double-sided tape to prevent color bleeding associated with wet glues.
For instance, metallic ribbons paired with neutral kraft paper and pastel tissue paper yield elegant gift wrapping solutions, as illustrated in Martha Stewart’s crafting references.
A common challenge arises from using wet adhesives with dry tissue paper, which can result in color bleeding; instead, employ dry mounting methods or spray adhesives such as Aleene’s Tacky Spray. Recommended practice includes sealing edges with Mod Podge to mitigate fraying and enhance overall durability.
This approach improves visual depth while upholding professional-quality finishes, making it particularly suitable for custom packaging applications.
What combinations work well for mixed textures?
Combining the softness of tissue paper with the coarseness of burlap provides an effective contrast without the need for adhesives.
To achieve an optimal combination, such as tissue layered over foil, follow these steps:
- Begin with a 12×12-inch sheet of foil as the base to provide a metallic sheen.
- Place a 10×10-inch square of tissue paper centered on top of the foil, gently pleating the edges to add dimension-incorporate approximately 1-inch folds at intervals of 2 inches.
- Fasten the assembly at the center using a twist tie or ribbon, eschewing glue to facilitate reusability.
- Complete the design by affixing a burlap ribbon bow (cut to 18 inches in length and 2 inches in width) around the middle, and trim the ends at a 45-degree angle for a refined appearance.
This method yields a textured gift wrapping that balances durability with delicacy, making it an ideal choice for holiday packaging.
Add a personal touch to every unboxing with custom tissue paper from APlasticBag.com — a trusted manufacturer and brand packaging expert. Crafted with quality and precision, our custom tissue papers elevate your packaging experience, making every product look premium, professional, and unforgettable.
Enhance your packaging with premium tissue paper that adds style and protection to every product. Order now at Aplasticbag.com and give your packaging a polished, branded finish that customers will remember.
 What Are the Environmental Benefits of Using Tissues Paper?
 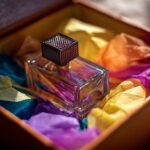 How Does Tissues Paper Enhance Product Presentation?
  Tissues Paper: Elevate Your Packaging with a Touch of Elegance
Comments